
Google Analytics allows your and your agency to analyze visitor traffic, painting a complete picture of your audience and their needs. You can track the routes people take to reach you and the devices they use to get there. This data gives web developers an overview on how user behave on your website to develop the website for the user. You can monitor traffic coming to your website from your paid or organic digital marketing campaigns.
Resource: http://www.google.ca/analytics/standard/
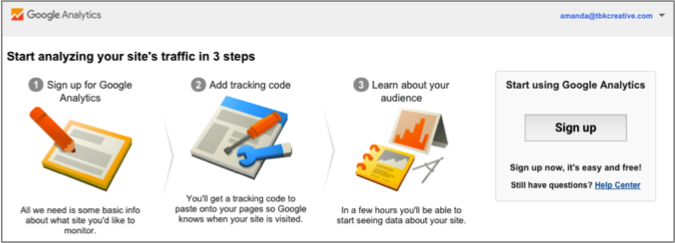
If you do not have a Google Analytics account, it is easy to create a new one for your website.
Step 1: Go to http://www.google.com/analytics/
Step 2: You will need to have an e-mail associated with a Gmail account. If you do not have one currently, you can set up your work e-mail or create one just for digital initiatives. You will be directed to the page shown below, click “sign up”.
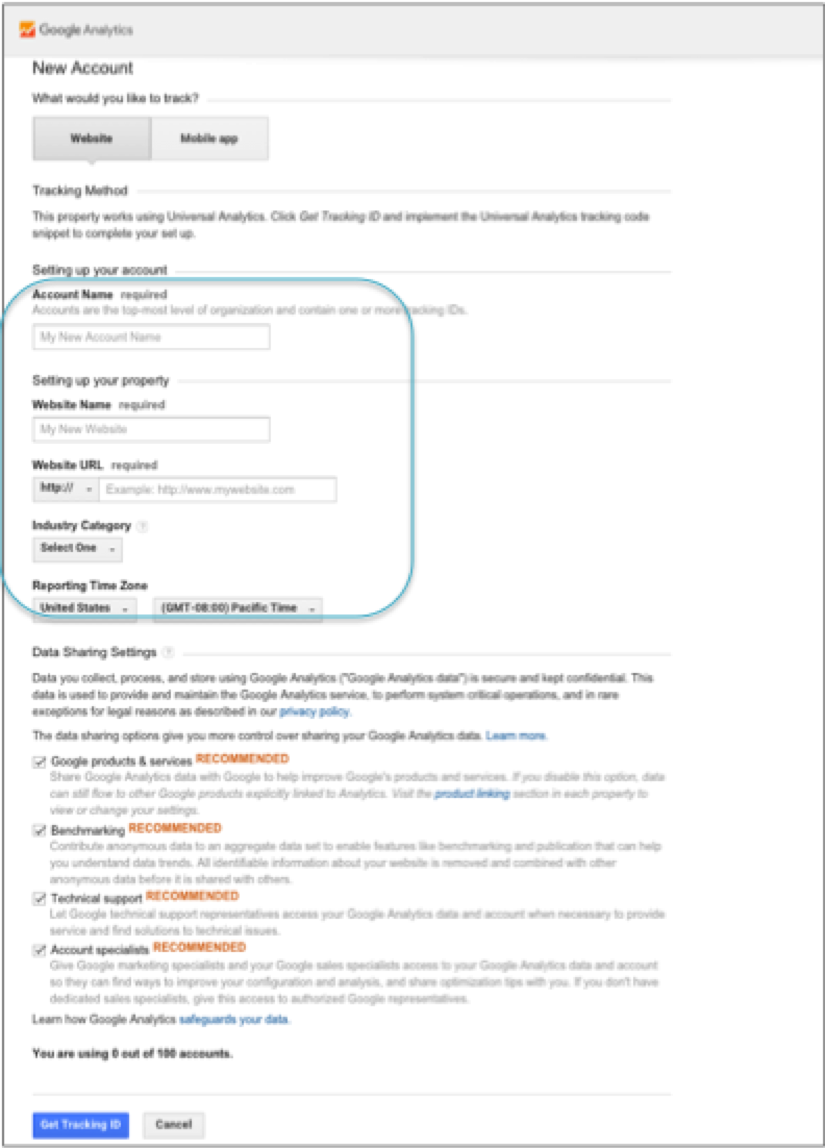
Step 3: Now here is where you will need to input your information for you website. Once you have added all of your information, you will need to click “get tracking ID” at the bottom of the page.
Step 4: A “Google Analytics Terms of Service Agreement” will pop up. You will need to select your country or region of residence. The terms will be updated, these should be read as you can only move forward if you accept the terms of Google Analytics.
Step 5: Once you accepted the Terms of Service, your account has been created. There is a website tracking code that has been created. The code will need to be installed in the heading of every page on your website or an SEO plug-in that may exist on your website.
![]()
This code will need to be sent to your current web development firm who has access to your website. If you do not have a firm or for any reason this cannot be completed, tbk Curative’s team will need FTP access to your website to install it for you.
Step 6: Once the code is installed, it will start collecting user data from your website.
If you already have a Google Analytics account and the code installed on your website, all you have to do is add tbk Creative as an administration.
Step 1: Log into your Google Analytics account, http://www.google.com/analytics/
Step 2: In the top heading, click “admin”
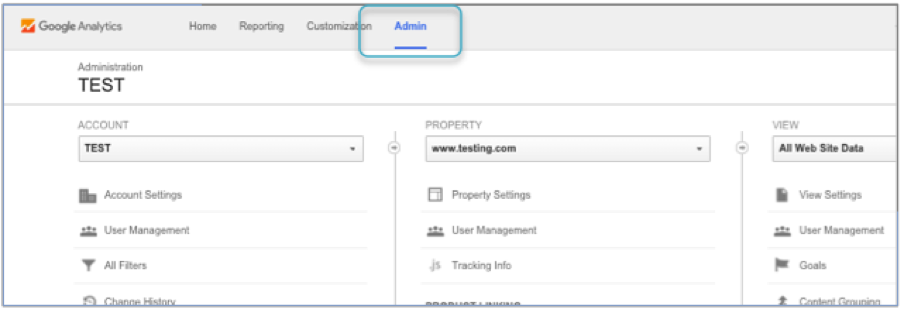
Step 3: In the property sittings in the middle column, click “user management”
Step 4: Once you are in the user management interface, you will input the e-mail that you want to add permissions for. This is where you will add digitaltbk@gmail.com or the e-mail that you want to make an admin. To ensure the administrator has enough access, the levels need to be set for edit, collaborate and read & analyze.
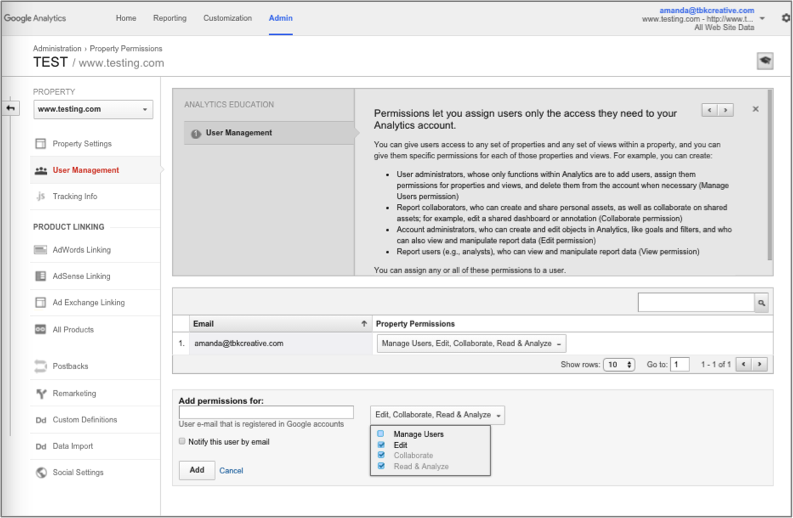
Step 5: Once you have added our e-mail address and set our permissions level, you will need to click “add”. Tbk Creative will now be added as user to your Google Analytics account for your website.
If you are experiencing any issues or if you have any questions, please reach out to your Account Manager at tbk Creative. We are happy to help!